
The classic **rice krispie treat recipe** is a beloved no-bake dessert for a reason. Its simplicity and nostalgic flavor make it a perfect treat for any occasion. But what if you could make it even better? Enter the **brown butter rice krispie treats**, a simple yet revolutionary upgrade that adds a deep, nutty, and toasted flavor to the familiar favorite. This simple step transforms the traditional gooey treat into something truly special and elevated. The difference is incredible, and once you try a **browned butter rice krispy treats** recipe, you will never go back. This is the **best rice krispie treat recipe** you will ever make. It is a simple step with an incredible result.
My first experience with a **brown butter rice krispie treats** recipe was at a friend’s party. I was expecting the usual gooey treat, but I was surprised by a rich, caramel-like flavor that made the classic so much more complex and delicious. I immediately had to know the secret, and they revealed the simple magic of browning the butter. From that day on, I have been obsessed with this simple upgrade. It’s a small change that makes a huge difference. This **rice krispie treats with browned butter** recipe is a game-changer.
- Why You’ll Love This Recipe
- Ingredients
- Instructions
- You Must Know
- Storage Tips
- Ingredient Substitutions
- Serving Suggestions
- Cultural and Historical Notes
- Seasonal Adaptations
- Three Helpful Notes about This Recipe
- Success Stories
- Freezer Meal Conversion
- Pro Tips
- Common Recipe Questions
- What You’ll Need
- Steps to Follow
- Extra Handy Tips
- Tools You’ll Need
- Allergy Details
Why You’ll Love This Recipe
- Easy to make with a few simple ingredients
- The browned butter adds a unique, nutty flavor
- Perfect for a quick, no-bake dessert
- A nostalgic treat with an elevated twist
Ingredients
The core ingredients for this **brown butter rice krispie treats** recipe are the same as the classic version, but the addition of browned butter is what truly sets it apart. The simple **rice krispie treats brown butter** combination is a match made in heaven.
- Butter: unsalted butter is best so you can control the saltiness.
- Mini marshmallows: they melt faster and create a gooey, marshmallowy texture.
- Vanilla extract: adds a classic, warm flavor.
- Rice Krispies cereal: the foundation of this classic treat.
- Salt: a pinch of salt balances the sweetness and enhances the nutty flavor of the browned butter.
Instructions
Brown The Butter:
In a large pot, melt the butter over medium heat. Continue to cook the butter, stirring occasionally, until it turns a light golden brown and smells nutty. This process, known as browning the butter, is the key to a great **brown butter rice krispie treats** recipe.
Melt The Marshmallows:
Once the butter is browned, reduce the heat to low and add the marshmallows. Stir constantly until the marshmallows are completely melted and the mixture is smooth. Remove from the heat and stir in the vanilla extract and salt.
Combine And Press:
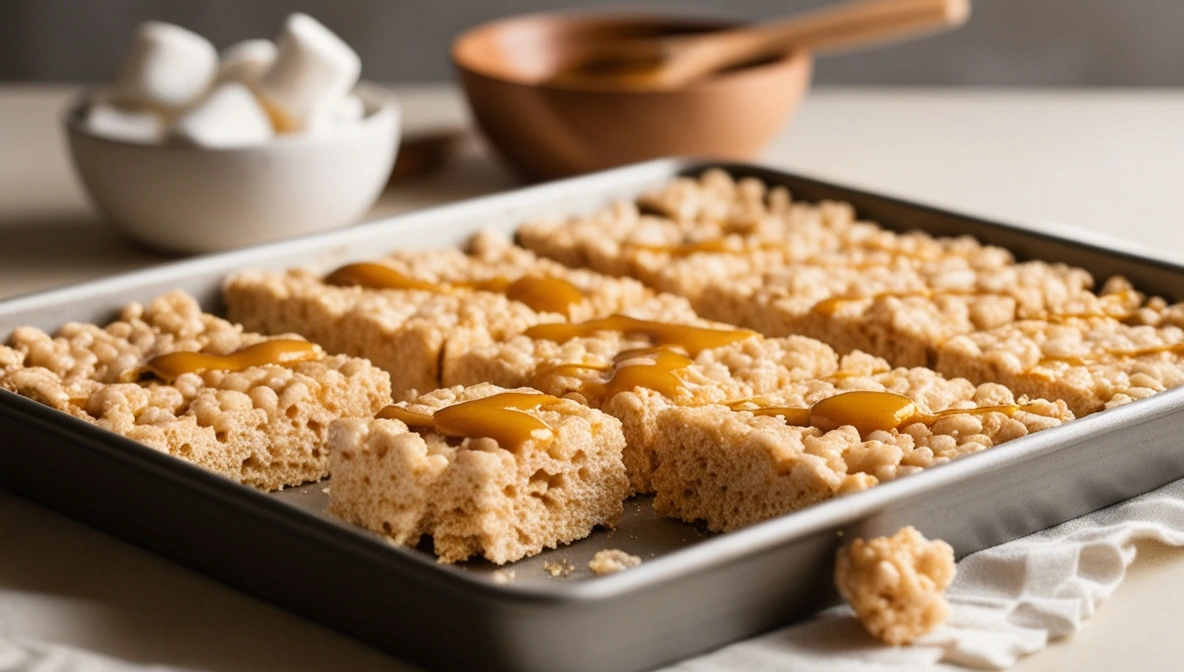
Quickly add the rice krispies cereal to the marshmallow mixture. Stir until the cereal is evenly coated. Pour the mixture into a greased 9×13-inch baking dish. Use a greased spatula or your hands to gently press the mixture evenly into the pan. Do not press too hard, as this will make the treats hard and dense.
Cool And Serve:
Let the treats cool for at least 30 minutes before cutting into squares. A chilled pan can help them set faster. Once set, cut into your desired size and serve. This is a great **browned butter rice krispy treats** recipe that everyone will love.
You Must Know
The magic of this **brown butter rice krispie treats** recipe lies in the caramel-like, nutty flavor that the browned butter adds. It’s a simple step that requires a little bit of attention but is well worth the effort. The result is a more complex and flavorful treat that will surprise and delight your taste buds. This is a simple but delicious **rice krispie treat recipe**.
Storage Tips
Store your **brown butter rice krispie treats** in an airtight container at room temperature for up to 3 days. To keep them from sticking together, you can place a piece of parchment paper between the layers. They are best when they are fresh and gooey, but they are still delicious the next day.
Ingredient Substitutions
For this **brown butter rice krispie treats** recipe, you can use a different type of cereal, such as another crispy puffed rice cereal. You can also add other mix-ins, such as chocolate chips, sprinkles, or nuts. For a different flavor, you can try using a different type of extract, such as almond or peppermint. This **rice krispie treats with browned butter** recipe is very versatile. For a great complement, check out our delicious Cream Cheese Chicken Enchiladas. For more professional cooking and health tips, you can explore resources from The New York Times Cooking.
Serving Suggestions
These **brown butter rice krispie treats** are a perfect standalone snack or dessert. You can also serve them with a scoop of vanilla ice cream or a drizzle of chocolate sauce. They are a great addition to any party or a potluck. You can even cut them into different shapes for a fun and festive look.
Cultural and Historical Notes
The original Rice Krispies Treats recipe was created in 1939 by a Kellogg’s employee. The recipe was first published in 1941 and has since become a staple in American households. This **browned butter rice krispy treats** recipe is a modern take on a classic. It shows how a simple recipe can be elevated with a single ingredient. It is a testament to the power of a simple upgrade.
Seasonal Adaptations
This **brown butter rice krispie treats** recipe is great for any season. In the fall, you can add a pinch of cinnamon or pumpkin pie spice to the mixture for a warm, cozy flavor. In the summer, you can add some colorful sprinkles for a fun and festive look. For the holidays, you can add some peppermint extract and crushed candy canes.
Three Helpful Notes about This Recipe
- Do not walk away from the butter while it is browning. It can go from perfect to burnt in a matter of seconds.
- Use mini marshmallows for a faster and smoother melting process.
- Press the mixture gently into the pan to prevent the treats from becoming hard and dense.
Success Stories
I have heard from so many people who have tried this **brown butter rice krispie treats** recipe and were amazed by the result. One person said they were able to make a classic treat so much better with this simple trick. This is a great recipe to impress your friends and family. The **best rice krispie treat recipe** is one that is both simple and delicious.
Freezer Meal Conversion
You can freeze the **brown butter rice krispie treats** for up to 3 months. Simply wrap them tightly in plastic wrap and then place them in a freezer bag. When you’re ready to eat them, let them thaw at room temperature for about 15-20 minutes.
Pro Tips
- For a more intense flavor, you can brown the butter a little bit longer.
- Use a greased spatula to press the mixture into the pan to prevent sticking.
- You can add a little bit of salt to the butter while it is browning to enhance the flavor.
Common Recipe Questions
→ how to make brown butter rice krispie treats?
To make **brown butter rice krispie treats**, you first brown the butter in a large pot. Then you add marshmallows and stir until they are melted. You then stir in vanilla and salt, and finally, the rice krispies.
→ What is the secret to the best rice krispie treat recipe?
The secret to the **best rice krispie treat recipe** is to use browned butter. This simple step adds a rich, nutty, and delicious flavor to the classic treat.
→ What’s the difference between browned butter rice krispie treats and regular ones?
The difference between **browned butter rice krispie treats** and regular ones is the flavor. Browning the butter adds a nutty, toasted, and rich flavor that makes the treats more complex and delicious.
→ Can I use regular butter instead of browned butter?
Yes, you can use regular butter, but it will not have the same rich, nutty flavor. If you want a classic treat, you can use regular butter. But if you want the best result, you should use browned butter.
→ Do you use mini marshmallows or large marshmallows?
Mini marshmallows are better for this **brown butter rice krispie treats** recipe because they melt faster and more evenly. You can use large marshmallows, but it may take a little longer to melt.
What You’ll Need
→ Ingredients
1 stick (1/2 cup) unsalted butter
1 (10 oz) bag mini marshmallows
1 tsp vanilla extract
1/4 tsp salt
6 cups Rice Krispies cereal
→ Tools
Large pot
9×13-inch baking dish
Spatula
Parchment paper
Steps to Follow
- Grease a 9×13-inch baking dish and line it with parchment paper.
- In a large pot, melt the butter over medium heat. Continue to cook until it turns a light golden brown and smells nutty.
- Add the mini marshmallows and stir until they are completely melted.
- Remove from heat and stir in the vanilla extract and salt.
- Add the cereal and stir until it is evenly coated.
- Pour the mixture into the prepared baking dish and gently press it down with a greased spatula.
- Let the treats cool for 30 minutes before cutting and serving.
Extra Handy Tips
For extra flavor, you can add a little bit of sea salt on top.
Do not press the mixture too hard into the pan, as this will make the treats hard.
You can add chocolate chips or sprinkles for a fun and festive look.
Tools You’ll Need
- Large pot
- Spatula
- Measuring cups and spoons
- 9×13-inch baking dish
Allergy Details
This **brown butter rice krispie treats** recipe contains dairy and is naturally gluten-free. It is important to verify ingredient labels and consult a healthcare professional if you have allergies.